
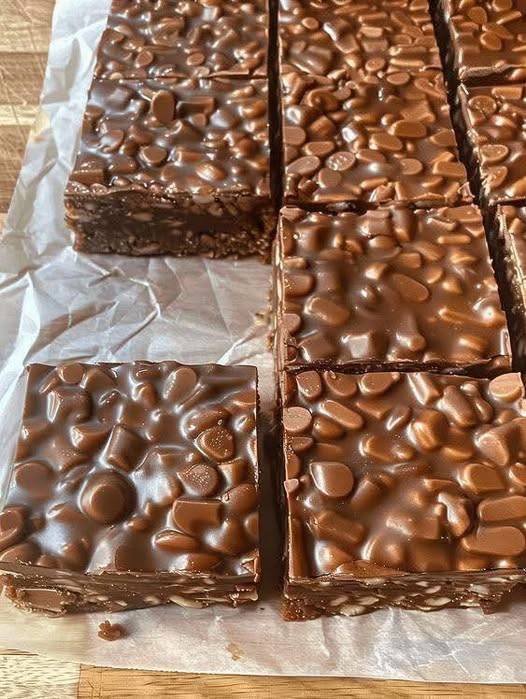
These No-Bake Chocolate Peanut Butter Crunch Bars are rich, creamy, crunchy, and very easy to make. They have a soft peanut butter cereal base, a smooth chocolate topping, and mini chocolate chips for extra chocolate flavor. Best of all, there is no oven needed.
They are great for parties, holidays, lunchbox treats, or a quick dessert when you want something sweet without spending hours in the kitchen.
Ingredients
For the Peanut Butter Crunch Base
- 1 cup (226 g) unsalted butter, melted
- 1½ cups (375 g) creamy or crunchy peanut butter
- 2 cups (240 g) powdered sugar, sifted
- 4 cups (112 g) Rice Krispies cereal
- 1 teaspoon vanilla extract
For the Chocolate Topping
- 1½ cups (255 g) milk chocolate chips
- ½ cup (125 g) peanut butter
- ½ cup (85 g) mini chocolate chips
Instructions
1. Prepare the Pan
Line a 9×13-inch baking pan with parchment paper. Leave some parchment hanging over the sides so you can easily lift the finished bars out later.
If you want thicker bars, use an 8×8-inch pan instead.
2. Melt the Butter
Place the butter in a large microwave-safe bowl. Heat it in 30-second intervals, stirring between each one, until completely melted.
Let the butter cool for about 1 minute before continuing.
3. Mix the Peanut Butter
Add the peanut butter and vanilla extract to the melted butter. Stir well until the mixture is smooth and fully combined.
There should be no separate streaks of butter or peanut butter.
4. Add the Powdered Sugar
Gradually mix in the powdered sugar. Add it in a few portions and stir after each addition.
Keep mixing until you have a thick, smooth peanut butter mixture with no dry sugar left.
5. Add the Cereal
Pour the Rice Krispies into the peanut butter mixture.
Gently fold everything together with a spatula. Take care not to crush the cereal. Keep folding until all of the cereal is coated with the peanut butter mixture.
6. Press Into the Pan
Transfer the mixture to the prepared pan.
Use a spatula or the bottom of a measuring cup to press it down firmly and evenly. Make sure the mixture reaches all the corners and forms a flat, compact layer.
Place the pan in the refrigerator while you make the chocolate topping.
7. Make the Chocolate Topping
Add the milk chocolate chips and ½ cup peanut butter to a clean microwave-safe bowl.
Heat in 30-second intervals, stirring well after each interval. Continue until the chocolate is completely melted and smooth.
Do not overheat the chocolate. Let it cool for 1–2 minutes before spreading it over the base.
8. Add the Chocolate Layer
Take the chilled peanut butter base out of the refrigerator.
Pour the melted chocolate mixture over the top. Use a spatula to spread it into an even layer, reaching all the edges.
9. Add Mini Chocolate Chips
While the chocolate is still melted, sprinkle the mini chocolate chips evenly over the top.
Gently press them into the chocolate so they stay in place after the bars have chilled.
10. Chill the Bars
Place the pan back in the refrigerator.
Chill for at least 2–3 hours, or until the chocolate layer is completely firm. The longer the bars chill, the easier they will be to cut cleanly.
11. Cut Into Bars
Once firm, use the parchment paper to lift the entire slab from the pan.
Place it on a cutting board and use a sharp knife to cut it into squares or bars.
For neat cuts, wipe the knife between slices.
Tips for the Best Crunch Bars
Use good peanut butter: Creamy peanut butter gives a smooth base, while crunchy peanut butter adds even more texture.
Do not crush the cereal: Fold the Rice Krispies gently into the peanut butter mixture so the bars stay light and crunchy.
Press the base firmly: A compact base will hold together much better when you cut the bars.
Do not overheat the chocolate: Heat slowly and stir often. This keeps the chocolate smooth and glossy.
Chill completely: Give the bars enough time to firm up before cutting. This helps create clean, even pieces.
Storage
Store the finished bars in an airtight container in the refrigerator. They will keep well for several days.
You can also freeze the bars. Place parchment paper between the layers to prevent them from sticking together. Thaw them in the refrigerator before serving.
Serving Ideas
These chocolate peanut butter crunch bars are delicious straight from the refrigerator. For a softer texture, let them sit at room temperature for a few minutes before eating.
Serve them with a cold glass of milk, coffee, or your favorite hot drink. They also make a great dessert for holiday trays, family gatherings, and parties.
Recipe Variations
You can easily change these bars to suit your taste.
- Use dark chocolate chips instead of milk chocolate.
- Add chopped peanuts to the chocolate layer.
- Sprinkle crushed pretzels over the top for a salty crunch.
- Add a little shredded coconut to the peanut butter base.
- Use white chocolate for a different topping.
- Drizzle melted peanut butter over the finished bars before chilling.
Final Thoughts
No-Bake Chocolate Peanut Butter Crunch Bars are a simple dessert with plenty of flavor and texture. The creamy peanut butter base, crispy cereal, and smooth chocolate topping work perfectly together.
Since they do not require baking, they are a great choice when you want a quick homemade treat. Make them ahead, let them chill, cut them into squares, and keep them ready in the fridge whenever a chocolate and peanut butter craving hits.
