
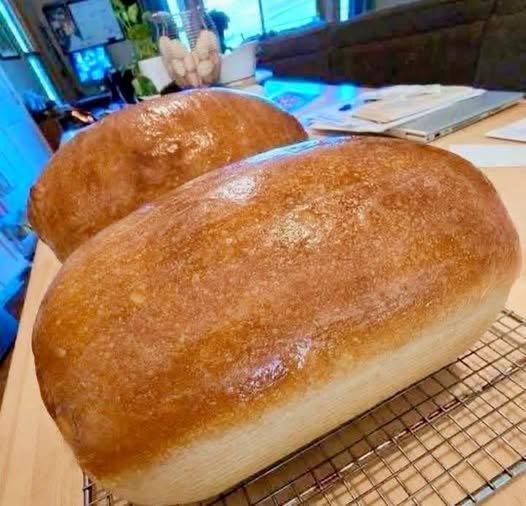
Yield: 1 loaf
Prep Time: 30 minutes active
Rise Time: 12–16 hours
Bake Time: 45–50 minutes
Total Time: About 13–17 hours
Difficulty: Intermediate
Homemade Sourdough Bread
Fresh sourdough bread has a crisp crust, a soft center, and a light tang that makes every slice special. The best part is that you do not need a lot of hands-on work. Most of the time is spent letting the dough rise and build flavor.
This easy artisan loaf is made with an active sourdough starter, bread flour, whole wheat flour, water, and salt. A Dutch oven helps trap steam during baking, giving the loaf a crisp crust and a nice rise.
Follow the steps below and use the look and feel of the dough as your guide. Sourdough can rise faster or slower depending on room temperature and starter strength.
Ingredients
- 100g active sourdough starter
- 375g warm water, about 75–80°F (24–27°C)
- 450g bread flour
- 50g whole wheat flour
- 10g fine sea salt
For Dusting
- Rice flour
- All-purpose flour
Equipment
- Digital kitchen scale
- Large mixing bowl
- Bench scraper
- Proofing basket or banneton
- Clean kitchen towel
- Sharp bread lame or razor
- Parchment paper
- Dutch oven with lid
How to Make Sourdough Bread
Step 1: Prepare the Active Starter
Your starter needs to be active and strong before you begin.
Mix 20g sourdough starter, 100g warm water, and 100g bread flour in a clean jar. Stir well, cover loosely, and leave it at room temperature.
Let it ferment until it has doubled in size and looks bubbly. The top should look slightly rounded rather than flat.
Depending on your room temperature and starter strength, this can take several hours.
A strong starter is one of the most important parts of a good sourdough loaf.
Step 2: Mix the Flour and Water
Add the 450g bread flour and 50g whole wheat flour to a large bowl.
Pour in the 375g warm water and mix with your hand or a dough whisk until no dry flour remains.
The dough will look rough and shaggy at this stage. That is normal.
Cover the bowl and let the mixture rest for 30–60 minutes.
This resting period gives the flour time to absorb the water and helps the dough develop strength.
Step 3: Add the Starter and Salt
Add 100g of your active starter to the dough.
With wet hands, pinch and fold the dough until the starter is evenly mixed in. Try not to tear the dough too much.
Let it rest for about 30 minutes.
Next, add 10g salt. If needed, mix the salt with a small splash of water first.
Use your fingers to gently pinch, squeeze, and fold the dough until the salt is fully mixed through.
The dough may feel sticky, but avoid adding lots of extra flour.
Step 4: Bulk Fermentation
Cover the bowl and let the dough ferment at room temperature for about 4–6 hours.
The exact time will depend on the temperature of your kitchen.
During the first 2–3 hours, perform coil folds about every 30 minutes.
How to Do a Coil Fold
- Wet your hands.
- Slide both hands under the center of the dough.
- Lift the dough gently.
- Let the ends fold underneath.
- Turn the bowl slightly.
- Repeat the movement 3–4 times.
After a few rounds, the dough should become smoother and stronger.
You do not need to keep folding for the whole fermentation time. Once the dough holds its shape well, leave it alone and let it rise.
How to Tell When Bulk Fermentation Is Done
Do not depend only on the clock. Look at the dough.
It should:
- Increase in size by around 30–50%
- Look smoother and more airy
- Have bubbles around the sides
- Feel lighter than when you started
- Jiggle slightly when the bowl is moved
If the dough has barely changed, give it more time.
Step 5: Pre-Shape the Dough
Lightly flour your work surface.
Use a bench scraper to gently turn the dough out onto the counter.
Shape it into a loose round. Do not press all the air out.
Let the dough rest uncovered for about 20–30 minutes.
This short rest makes the final shaping easier.
Step 6: Shape the Loaf
Lightly flour the top of the dough and turn it over.
Fold the bottom section toward the center. Fold both sides inward, then bring the top section toward the center.
Gently roll or fold the dough into a tight round.
Use a bench scraper to create a little surface tension by pulling the dough toward you across the counter.
The outside should feel smooth and tight, while the inside stays soft and airy.
Step 7: Place in the Banneton
Mix a little rice flour with all-purpose flour and dust your proofing basket well.
Rice flour works especially well because it helps reduce sticking.
Place the shaped dough into the basket seam-side up.
Cover the basket with a clean towel or reusable cover.
Step 8: Cold Proof Overnight
Place the covered dough in the refrigerator for 12–16 hours.
The cold proof gives the loaf time to develop more flavor while also making the dough easier to score and bake.
You can bake the loaf straight from the refrigerator the next morning.
Step 9: Preheat the Oven
Place your Dutch oven, including the lid, inside the oven.
Preheat to 475°F (245°C) for at least 45 minutes.
A fully heated Dutch oven helps the bread rise quickly when it first enters the oven.
Step 10: Score the Dough
Take the cold dough from the refrigerator.
Place a piece of parchment paper on your work surface and carefully turn the dough onto it.
Use a sharp bread lame or razor to make one deep, confident slash across the top.
The cut gives the bread a controlled place to expand during baking.
You can also add a few small decorative cuts if you like.
Step 11: Bake the Sourdough
Carefully transfer the dough into the hot Dutch oven.
Cover with the lid and bake for 25 minutes at 475°F (245°C).
Remove the lid and reduce the oven temperature to 450°F (230°C).
Continue baking for another 20–25 minutes, or until the crust is a deep golden brown.
If you prefer a darker, crunchier crust, let it bake for a few extra minutes while keeping a close eye on it.
Step 12: Cool Before Slicing
Remove the bread from the Dutch oven and place it on a wire rack.
Let it cool for at least 3–4 hours before cutting.
It may be tempting to slice it right away, but the inside is still setting while the loaf cools. Cutting too soon can leave the crumb gummy.
Once cool, use a serrated bread knife to slice it.
Tips for Better Sourdough Bread
Use an Active Starter
A weak starter can lead to slow fermentation and a dense loaf. Make sure your starter is bubbly, active, and rising well before starting the dough.
Watch the Dough, Not Just the Time
Temperature can change fermentation speed. A warm kitchen may make the dough rise much faster, while a cool kitchen can slow it down.
Do Not Add Too Much Flour
Sticky dough is normal for sourdough. Adding too much flour can make the finished bread heavy.
Wet your hands when handling the dough instead.
Give the Dough Enough Time
If the dough has not risen enough, do not rush to shape it. Let fermentation continue until you see clear signs of activity.
Preheat the Dutch Oven Well
A hot Dutch oven creates a strong burst of heat and helps the loaf rise during the first part of baking.
Use Rice Flour in the Banneton
Rice flour helps prevent the dough from sticking to the basket and makes it easier to turn the loaf out cleanly.
Common Sourdough Problems
Why Didn’t My Dough Rise?
Your starter may not have been active enough, or the dough may have been kept in a cool place.
Try feeding your starter regularly before baking day and give the dough more time to ferment.
Why Is My Loaf Flat?
A flat loaf can happen when the dough is under-proofed, over-proofed, or not shaped with enough surface tension.
Use the appearance and feel of the dough as your guide.
Why Is My Crust Pale?
The Dutch oven or oven may not have been hot enough. Make sure the oven and Dutch oven are fully preheated before baking.
Why Is the Crust Too Thick?
The loaf may have been baked too long or at too high a heat for your oven. Keep an eye on the crust during the uncovered baking stage.
Why Did the Dough Stick to the Basket?
The basket may not have been dusted well enough. A mixture containing rice flour can help reduce sticking.
How to Store Sourdough Bread
Once completely cool, keep the loaf at room temperature in a bread bag, paper bag, or bread box.
For the best crust, avoid sealing warm bread in an airtight plastic bag.
If you will not finish the loaf within a few days, slice it and freeze the slices in a freezer-safe bag. Take out individual slices as needed and warm them in a toaster or oven.
Serving Ideas
Fresh sourdough is great with:
- Butter and sea salt
- Fried or scrambled eggs
- Avocado
- Cream cheese
- Soup
- Grilled cheese
- Sandwich fillings
- Jam or honey
- Olive oil and herbs
You can also toast leftover slices and serve them with breakfast or use them to make homemade croutons.
Final Thoughts
This easy artisan sourdough loaf takes time, but most of that time is hands-off. Once you get used to reading the dough, the process becomes much easier.
A strong starter, good fermentation, gentle shaping, and a hot Dutch oven are the main keys to a loaf with a crisp crust and soft, airy center.
Make it once, learn how your dough behaves, and you will have a much better feel for sourdough with every bake.
