
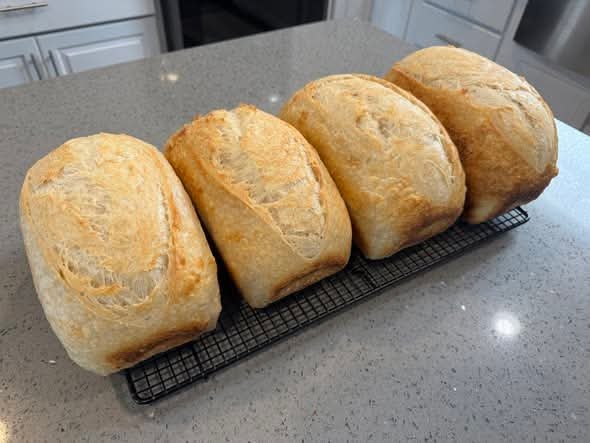
This homemade Sourdough Sandwich Bread is soft, fluffy, and perfect for everyday sandwiches. Milk and butter help give the bread a tender crumb, while active sourdough starter adds a mild tang and deep flavor.
It is great for toast, grilled sandwiches, breakfast, or simple lunch sandwiches. The dough takes some time to rise, but the actual hands-on work is easy.
Ingredients
- 500g bread flour or all-purpose flour
- 100g active sourdough starter, fed and bubbly
- 250ml lukewarm milk or water
- 30g butter, softened
- 25g sugar, optional
- 10g salt
Instructions
1. Make the Dough
Add the active sourdough starter, lukewarm milk, and sugar to a large mixing bowl. Stir until the starter is mostly mixed into the liquid.
Add the flour and mix until a rough dough forms.
Add the salt and softened butter. Knead the dough for about 8–10 minutes by hand or with a stand mixer.
The finished dough should feel smooth, soft, and slightly tacky. It should not feel extremely sticky.
2. First Rise
Place the dough in a lightly greased bowl and cover it with a clean kitchen towel or plastic wrap.
Let it rise in a warm place for about 4–6 hours.
During the first few hours, perform a gentle stretch and fold about 2–3 times. A good way is to stretch one side of the dough upward and fold it over the center. Turn the bowl and repeat around the dough.
By the end of bulk fermentation, the dough should look softer and slightly puffy.
The exact rising time can change based on room temperature and how active your sourdough starter is.
3. Shape the Loaf
Lightly flour your work surface and transfer the dough onto it.
Gently shape or roll the dough into a rectangle.
Starting from one short side, roll the dough tightly into a loaf shape. Try to keep the roll even so the bread rises well in the pan.
Place the shaped dough into a greased loaf pan with the seam facing down.
4. Second Rise
Cover the loaf pan and let the dough proof for about 2–4 hours.
Keep an eye on the dough instead of relying only on the clock. When it has risen close to the top of the loaf pan and looks light and puffy, it is ready to bake.
If your kitchen is cool, the second rise may take longer.
5. Bake the Bread
Preheat your oven to 180°C (350°F).
Place the loaf in the oven and bake for approximately 30–35 minutes.
The top should become golden brown and the loaf should feel firm when gently tapped.
If the top starts browning too fast, loosely cover it with foil during the last part of baking.
6. Cool Completely
Remove the bread from the oven and carefully take it out of the loaf pan.
Place it on a wire rack and allow it to cool completely.
Try not to slice the bread while it is still hot. Cutting too early can make the inside gummy and may cause the slices to lose their shape.
Once completely cool, use a sharp bread knife to cut the loaf into even slices.
Helpful Tips
Use an Active Starter
Your sourdough starter should be fed, bubbly, and active before you begin. A weak starter may not provide enough rise, which can result in a dense loaf.
Don’t Add Too Much Flour
The dough should be soft and slightly tacky. Adding a lot of extra flour can make the finished bread dry and heavy.
Milk Makes It Softer
Milk helps create a soft and tender sandwich bread. If you prefer, you can replace the milk with water, but the texture may be a little less rich.
Butter Adds Tenderness
Softened butter helps make the bread softer and more flavorful. You can leave it out if needed, although the final texture may be slightly less tender.
Watch the Dough, Not Just the Clock
Sourdough fermentation depends on temperature, starter strength, and other factors. A warm kitchen will usually speed up the rise, while a cool kitchen will slow it down.
Look for a dough that becomes noticeably puffy and airy before moving to the next step.
Overnight Proofing Option
For more flavor, you can use a longer fermentation.
After shaping the loaf and placing it in the loaf pan, cover it well and place it in the refrigerator overnight.
The next day, let the dough sit at room temperature until it becomes puffy and reaches close to the top of the pan. Then bake as directed.
This method can make the bread more flavorful while also making the baking process easier to fit around your schedule.
How to Serve Sourdough Sandwich Bread
This bread can be used in many ways.
Toast slices and spread them with butter or your favorite jam. Use it to make turkey, chicken, tuna, or cheese sandwiches. It also works well for grilled cheese and breakfast sandwiches.
For a simple breakfast, toast two slices and top them with eggs, avocado, or peanut butter.
How to Store It
Once the bread has cooled completely, keep it in an airtight bread bag or container at room temperature.
Avoid slicing the whole loaf until you need it, as keeping the loaf whole can help maintain its texture.
For longer storage, sliced bread can be frozen. Place parchment paper between slices so you can remove only what you need.
Frequently Asked Questions
Can I use all-purpose flour?
Yes. Bread flour gives a slightly chewier structure, but all-purpose flour can also be used successfully.
Can I use water instead of milk?
Yes. Water works as a simple substitute. Milk gives the loaf a softer and richer texture.
Why is my sourdough sandwich bread dense?
A dense loaf is often caused by an inactive starter, insufficient fermentation, or cutting the bread before it has cooled completely.
Can I skip the sugar?
Yes. Sugar is optional in this recipe. It adds a little sweetness and can help create a softer sandwich-style loaf.
Can I make this bread overnight?
Yes. You can refrigerate the shaped loaf overnight and continue proofing it the next day before baking.
Final Thoughts
This Sourdough Sandwich Bread is a simple homemade loaf with a soft texture and mild sourdough flavor. The combination of active starter, milk, butter, and flour creates bread that is ideal for everyday use.
Once you get familiar with how your dough behaves in your kitchen, this recipe can become a reliable favorite for sandwiches, toast, and breakfast.
