
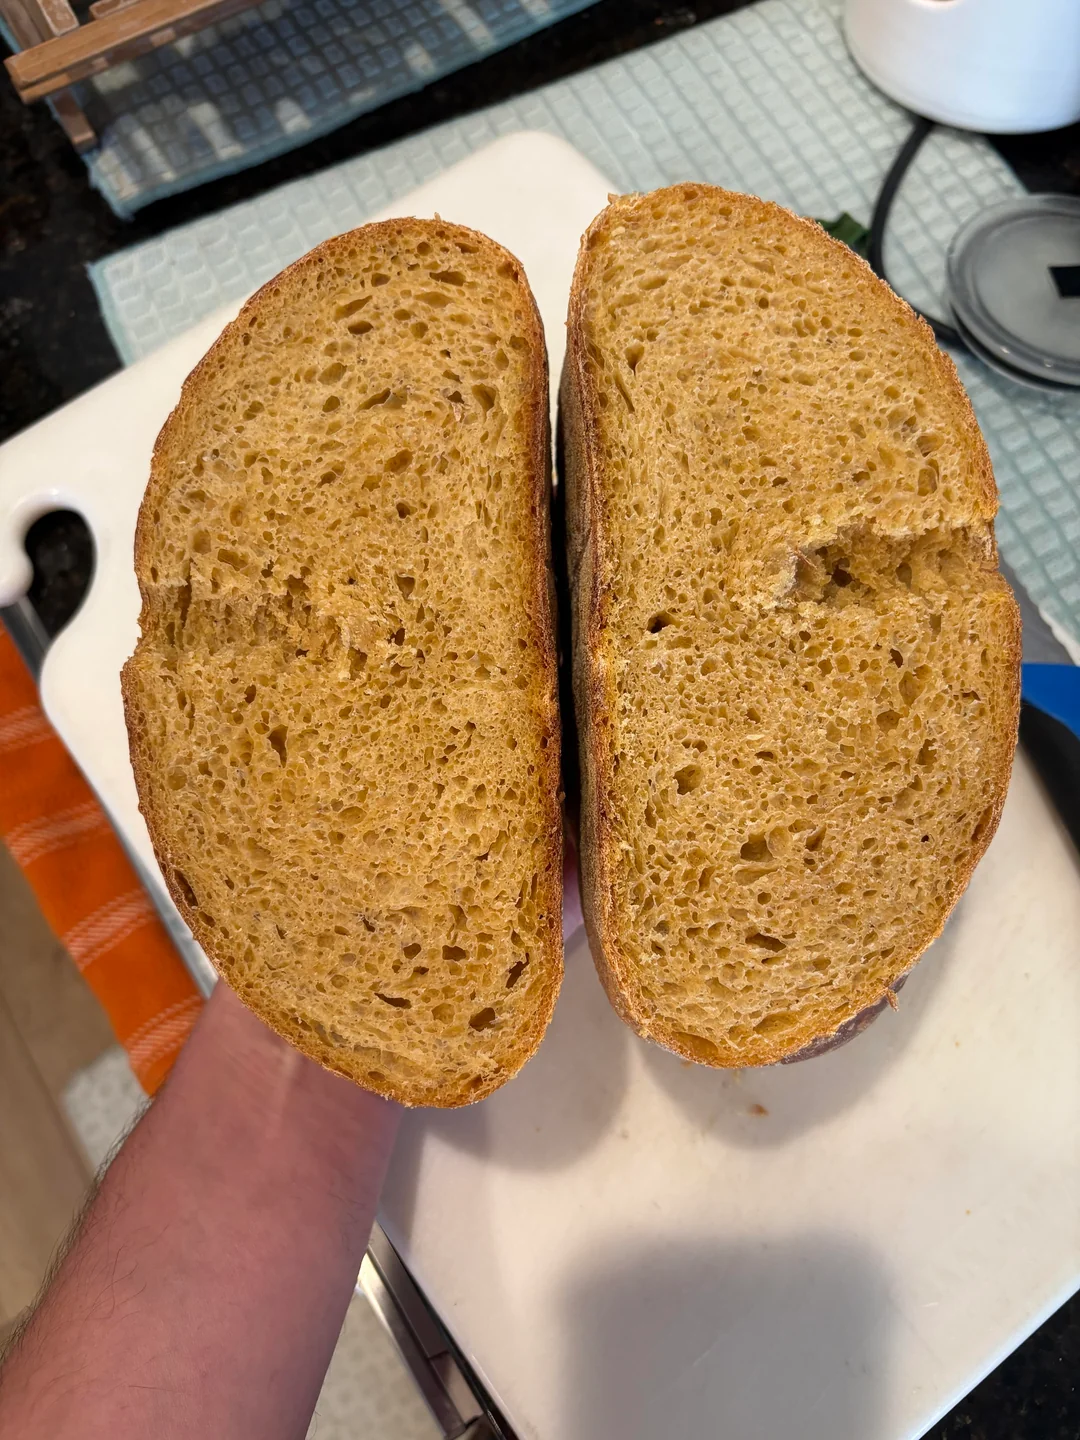
There’s something magical about baking sourdough bread during the autumn season, and this Pumpkin Sourdough Bread captures everything we love about fall. Shaped like a pumpkin and baked until deeply golden brown, this artisan loaf is not only beautiful but also packed with incredible flavor. With its crisp crust, soft airy crumb, subtle pumpkin flavor, and decorative scoring, this bread makes the perfect centerpiece for holiday gatherings, Thanksgiving tables, and cozy family meals.
What makes this pumpkin sourdough special is the addition of pumpkin puree, which adds moisture, a beautiful golden-orange color, and a hint of natural sweetness. Combined with the complex tang of sourdough fermentation, the result is a loaf that is rustic, flavorful, and visually stunning.
Whether you’re an experienced sourdough baker or just starting your sourdough journey, this recipe will help you create a bakery-worthy pumpkin-shaped loaf right in your own kitchen.
Why You’ll Love This Recipe
- Beautiful pumpkin-shaped design
- Crispy artisan crust
- Soft and fluffy crumb
- Made with real pumpkin puree
- Perfect for Thanksgiving and fall gatherings
- Naturally fermented flavor
- Great centerpiece bread
Ingredients
For the Dough
- 500g bread flour
- 100g active sourdough starter
- 300g pumpkin puree
- 150g water
- 10g salt
For Decoration
- Kitchen twine
- Cinnamon stick for stem
- Fresh sage or basil leaf (optional)
Equipment
- Mixing bowl
- Dough scraper
- Banneton basket
- Dutch oven
- Kitchen twine
- Bread lame or razor blade
Step 1: Feed Your Starter
Feed your sourdough starter 4–6 hours before mixing the dough.
Your starter should be active, bubbly, and doubled in size.
A healthy starter ensures proper fermentation and a light, airy crumb.
Step 2: Mix the Dough
In a large bowl combine:
- Pumpkin puree
- Water
- Active sourdough starter
Mix until smooth.
Add bread flour and stir until no dry flour remains.
Cover and let rest for 30 minutes.
This autolyse period helps gluten development.
After resting, add salt and mix thoroughly.
Step 3: Bulk Fermentation
Cover the bowl and allow the dough to ferment for 4–6 hours.
During the first 2 hours perform four sets of stretch and folds every 30 minutes.
Each fold strengthens the dough and improves structure.
The dough should become smoother and hold its shape well.
By the end of fermentation it should increase noticeably in volume.
Step 4: Pre-Shape
Transfer the dough onto a lightly floured work surface.
Shape gently into a round ball.
Allow to rest for 20 minutes uncovered.
This bench rest helps relax the gluten before final shaping.
Step 5: Final Shape
Shape the dough into a tight boule.
Create strong surface tension without tearing the dough.
Place seam-side up into a floured banneton basket.
Step 6: Cold Fermentation
Cover and refrigerate overnight for 12–16 hours.
Cold fermentation develops flavor and makes scoring easier.
This slow rise creates the rich tangy flavor sourdough is known for.
Step 7: Create the Pumpkin Shape
Before baking, prepare four long pieces of kitchen twine.
Arrange them in a star pattern.
Carefully place the dough onto the twine.
Tie the strings loosely around the dough.
Do not tighten too much because the dough will expand while baking.
The twine creates the pumpkin ridges.
Step 8: Decorative Scoring
Dust the dough lightly with flour.
Using a bread lame, score decorative leaf patterns around the loaf.
These cuts will open beautifully during baking and create an elegant artisan look.
Step 9: Bake
Preheat a Dutch oven to 475°F (245°C).
Transfer the dough into the hot Dutch oven.
Cover with lid.
Bake for 20 minutes.
Remove the lid.
Reduce temperature to 425°F (220°C).
Bake for another 20–25 minutes until deep golden brown.
The crust should be crisp and caramelized.
Step 10: Create the Pumpkin Stem
Allow the loaf to cool completely.
Carefully remove the kitchen twine.
Insert a cinnamon stick into the center of the loaf.
Add a fresh leaf beside the stem for a realistic pumpkin appearance.
The finished bread looks like a beautiful handcrafted pumpkin.
Tips for Perfect Pumpkin Sourdough
Use Thick Pumpkin Puree
Watery pumpkin puree can make the dough too sticky.
Use pure pumpkin puree, not pumpkin pie filling.
Don’t Tighten the Twine Too Much
Loose twine allows the loaf to expand naturally during baking.
Bake Until Deeply Golden
A darker crust develops richer flavor and better texture.
Cool Completely
Allow at least one hour before slicing.
This helps the crumb finish setting properly.
Flavor Variations
Cinnamon Pumpkin Sourdough
Add 1 teaspoon cinnamon and ½ teaspoon nutmeg.
Honey Pumpkin Bread
Mix in 2 tablespoons honey.
Maple Pumpkin Sourdough
Replace some water with maple syrup.
Pumpkin Spice Loaf
Add pumpkin pie spice for a warm autumn flavor.
Serving Suggestions
This pumpkin sourdough pairs perfectly with:
- Salted butter
- Honey
- Apple butter
- Cream cheese
- Soup
- Thanksgiving dinner
- Charcuterie boards
It is especially delicious alongside roasted vegetables and warm autumn soups.
Storage Instructions
Store in a bread box or paper bag for up to 3 days.
For longer storage:
- Slice completely
- Freeze in airtight bags
- Reheat before serving
Frequently Asked Questions
Can I Make It Without Pumpkin Puree?
Yes, but the loaf will lose some moisture, flavor, and color.
Why Use Kitchen Twine?
The twine creates the pumpkin ridges that give the bread its signature shape.
Can I Freeze This Bread?
Absolutely. Freeze whole or sliced for up to 3 months.
Final Thoughts
This Pumpkin Sourdough Bread is the perfect combination of artisan baking and seasonal creativity. With its rustic crust, tender crumb, beautiful pumpkin shape, and rich sourdough flavor, it becomes more than just bread—it becomes edible art. Whether displayed on a holiday table, gifted to friends, or enjoyed with a bowl of soup, this stunning loaf celebrates everything wonderful about homemade sourdough and the cozy flavors of fall.
