
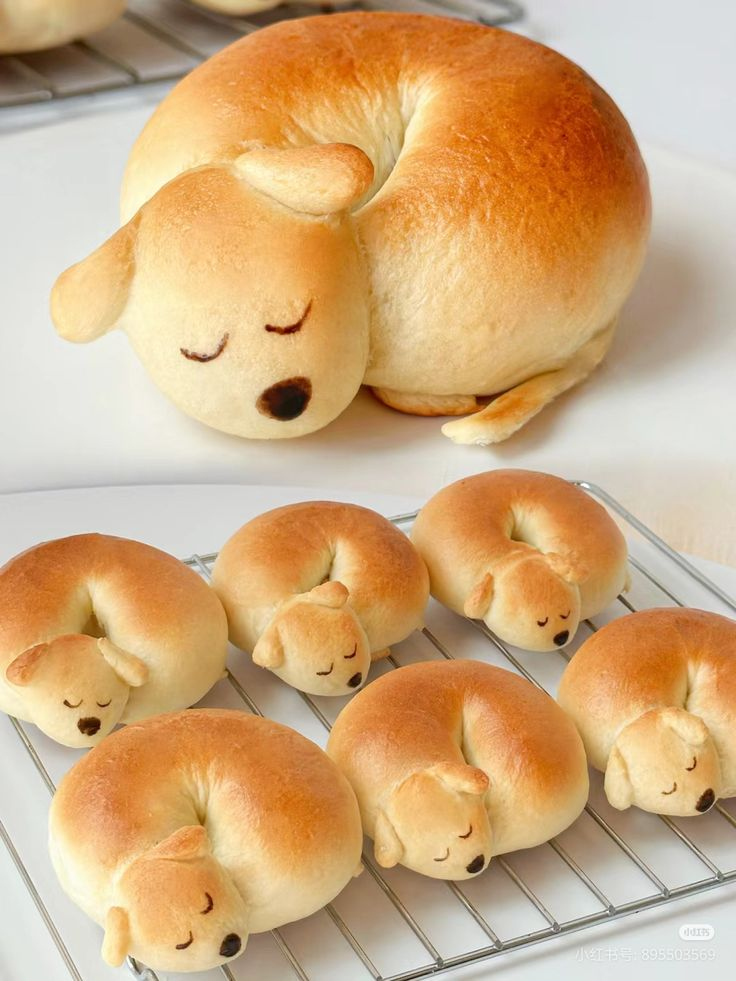
There is something incredibly heartwarming about homemade bread, but when that bread is shaped like a sleeping puppy, it becomes almost too cute to eat. These Sleeping Puppy Bread Buns are soft, fluffy, lightly sweet, and perfect for breakfast, snacks, parties, or special occasions. Their adorable design makes them especially popular with children, while adults love their pillowy texture and rich buttery flavor.
Made with a simple milk bread dough, these puppy-shaped buns are surprisingly easy to create. The dough is soft and easy to work with, allowing you to shape the ears, nose, and curled sleeping body that give these buns their charming appearance. Once baked, they develop a beautiful golden-brown crust while remaining incredibly soft inside.
Whether you’re an experienced baker or a beginner looking for a fun baking project, these cute puppy bread buns are guaranteed to bring smiles to everyone who sees them.
Why You’ll Love This Recipe
- Adorable puppy design
- Soft and fluffy texture
- Perfect for kids
- Easy to customize
- Great for parties and gifts
- Lightly sweet flavor
- Beginner-friendly recipe
Ingredients
For the Dough
- 3½ cups bread flour
- ¼ cup sugar
- 1 teaspoon salt
- 2¼ teaspoons instant yeast
- 1 cup warm milk
- 1 large egg
- ¼ cup unsalted butter, softened
For Decoration
- Melted chocolate or edible food marker
- Small amount of dough reserved for ears and paws
Egg Wash
- 1 egg
- 1 tablespoon milk
Equipment Needed
- Large mixing bowl
- Baking tray
- Parchment paper
- Pastry brush
- Cooling rack
Step 1: Prepare the Dough
In a large mixing bowl combine:
- Bread flour
- Sugar
- Salt
- Instant yeast
Mix well.
In a separate bowl combine warm milk and egg.
Pour the wet ingredients into the flour mixture.
Mix until a rough dough forms.
Add softened butter.
Knead for approximately 10–12 minutes until the dough becomes smooth, elastic, and slightly glossy.
The dough should pass the windowpane test, meaning it can stretch thinly without tearing.
Step 2: First Rise
Place the dough into a lightly greased bowl.
Cover with plastic wrap or a kitchen towel.
Allow it to rise in a warm place for about 60–90 minutes or until doubled in size.
This step develops flavor and creates the soft texture that makes milk bread so delicious.
Step 3: Divide the Dough
Punch down the dough gently.
Transfer to a lightly floured surface.
Divide into equal portions.
For standard-sized puppy buns, divide into 6 pieces.
Reserve a small amount of dough from each portion for:
- Ears
- Paws
- Tail
Step 4: Shape the Puppy Body
Roll the main portion into a smooth rope.
Curl the rope into a circular shape resembling a sleeping puppy curled into a ball.
Leave a small opening in the center.
This creates the characteristic sleeping pose.
Place onto a lined baking tray.
Step 5: Create the Head
Shape a smaller dough ball for the puppy’s head.
Attach it gently to the front of the curled body.
Press lightly to secure.
The head should slightly overlap the body for a natural appearance.
Step 6: Add Ears and Paws
Using reserved dough:
Shape two small ears.
Attach them to the sides of the head.
Create tiny paws and place them underneath the face.
Add a small tail if desired.
These details make the puppy look more realistic and adorable.
Step 7: Second Proof
Cover the shaped buns loosely.
Allow them to proof for 30–45 minutes.
The dough should become puffy but still hold its shape.
Avoid over-proofing, as the puppy details may lose definition.
Step 8: Apply Egg Wash
Whisk together:
- 1 egg
- 1 tablespoon milk
Brush gently over the buns.
This creates the beautiful golden color after baking.
Be careful not to disturb the puppy features.
Step 9: Bake
Preheat oven to 350°F (175°C).
Bake for 15–18 minutes.
The buns should become lightly golden brown.
Avoid overbaking to maintain softness.
The aroma of fresh bread will fill your kitchen.
Step 10: Add the Face
Allow the buns to cool completely.
Using melted chocolate or an edible food marker, draw:
- Closed eyes
- Small nose
- Tiny mouth if desired
The sleepy facial expression gives these buns their signature charm.
Tips for Perfect Puppy Bread
Use Bread Flour
Bread flour creates a softer, chewier texture.
Keep Shapes Simple
Simple shapes often produce the cutest results after baking.
Don’t Overbake
A light golden color keeps the bread soft and fluffy.
Let the Dough Rise Properly
Proper fermentation creates a lighter texture.
Flavor Variations
Chocolate-Filled Puppy Buns
Add chocolate pieces inside before shaping.
Strawberry Cream Puppy Bread
Fill with strawberry cream filling.
Custard Puppy Buns
Use vanilla custard for a bakery-style treat.
Nutella Puppy Bread
Fill each bun with Nutella before baking.
Storage Instructions
Store in an airtight container.
Room temperature: 2–3 days
Refrigerator: Up to 5 days
Freezer: Up to 2 months
Warm slightly before serving for the best texture.
Serving Suggestions
These adorable puppy buns are perfect for:
- Children’s parties
- School snacks
- Breakfast tables
- Baby showers
- Afternoon tea
- Holiday gatherings
- Homemade gifts
Serve with:
- Milk
- Coffee
- Hot chocolate
- Fruit jam
- Honey
- Butter
Frequently Asked Questions
Can I Make These Ahead?
Yes. Shape the puppies and refrigerate overnight before baking.
Can I Freeze Them?
Absolutely. Freeze after baking and cool completely.
Can I Use All-Purpose Flour?
Yes, but bread flour provides a softer and fluffier result.
Final Thoughts
Sleeping Puppy Bread Buns are one of the cutest homemade baking projects you can make. Their soft milk bread texture, adorable sleeping puppy shape, and lightly sweet flavor make them a favorite for both children and adults. Whether you’re baking for a family breakfast, a special event, or simply for fun, these charming puppy buns are guaranteed to bring smiles and make any table look extra special.
