
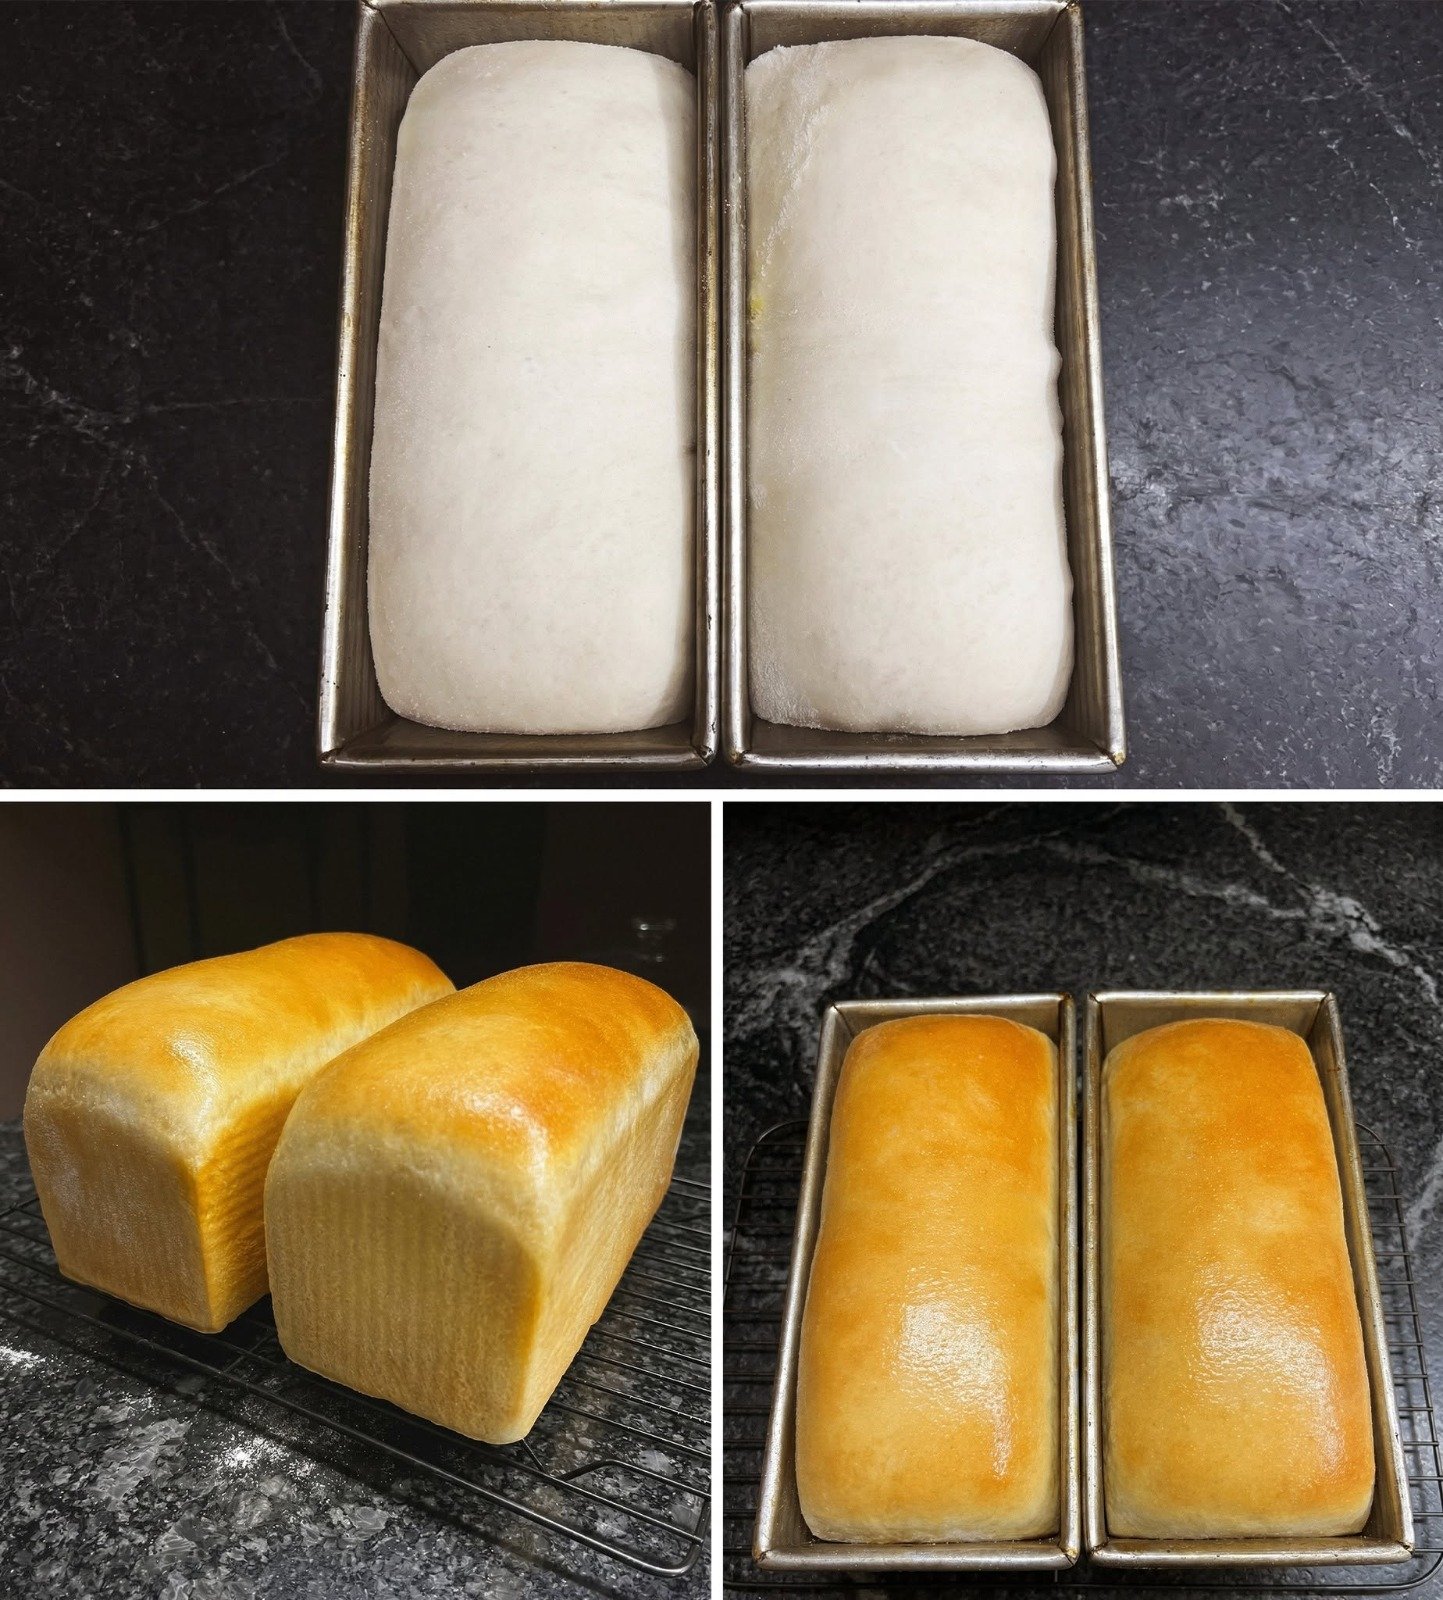
There’s something incredibly satisfying about baking your own sourdough bread at home. The aroma that fills the kitchen, the golden crust, and the soft, fluffy interior make every slice worth the effort. Unlike traditional artisan sourdough with a thick crust and open crumb, this sourdough sandwich bread is designed to be soft, tender, and perfect for everyday use.
Whether you’re making sandwiches for lunch, toast for breakfast, or enjoying a warm slice with butter, this loaf delivers the perfect balance of flavor and texture. The natural fermentation from the sourdough starter gives the bread a subtle tang while keeping it fresh longer than regular bread.
This recipe creates two beautiful sandwich loaves with a soft crumb and a light golden crust, making it ideal for families who love homemade bread.
Why You’ll Love This Recipe
One of the biggest advantages of sourdough sandwich bread is its flavor. Unlike commercial bread made with instant yeast, sourdough develops a deeper taste through slow fermentation. The result is bread that is rich, slightly tangy, and incredibly soft.
This recipe is:
- Soft and fluffy
- Perfect for sandwiches and toast
- Made with active sourdough starter
- Easy to slice
- Naturally fermented
- Family-friendly
- Great for meal prep
- Freezer-friendly
Ingredients
For the Dough
- 200g active sourdough starter
- 700g bread flour
- 400g warm milk
- 50g warm water
- 50g sugar
- 60g unsalted butter, softened
- 12g salt
- 1 large egg
For Brushing
- 2 tablespoons melted butter
Equipment Needed
- Two loaf pans
- Large mixing bowl
- Dough scraper
- Kitchen scale
- Plastic wrap or towel
- Cooling rack
How to Make Sourdough Sandwich Bread
Step 1: Feed Your Starter
Start by feeding your sourdough starter about 4–6 hours before mixing the dough. You want the starter to be active, bubbly, and at its peak rise.
A healthy starter is the key to achieving a beautiful rise and soft texture.
Step 2: Mix the Ingredients
In a large bowl, combine the active sourdough starter, warm milk, warm water, sugar, and egg.
Mix until smooth.
Add the bread flour and salt. Stir until a rough dough forms.
Add the softened butter and continue mixing until incorporated.
The dough will feel slightly sticky at first, but it will become smoother as you knead.
Step 3: Knead the Dough
Transfer the dough to a lightly floured surface.
Knead for approximately 10–12 minutes until smooth and elastic.
If using a stand mixer, knead with a dough hook for about 8–10 minutes.
The dough should pass the windowpane test, meaning you can stretch a small piece thin enough to see light through it without tearing.
Step 4: Bulk Fermentation
Place the dough in a lightly greased bowl.
Cover and let it ferment at room temperature for 4–6 hours, depending on the strength of your starter and the temperature of your kitchen.
The dough should become puffy and increase noticeably in size.
During the first two hours, perform a set of stretch-and-folds every 30 minutes to strengthen the dough structure.
Step 5: Divide and Shape
Once the dough has finished fermenting, transfer it to a lightly floured surface.
Divide it into two equal portions.
Flatten each piece gently into a rectangle.
Roll each rectangle tightly into a log shape, pinching the seam closed.
This creates the smooth, bakery-style appearance seen in classic sandwich loaves.
Step 6: Place in Loaf Pans
Grease two loaf pans lightly.
Place each shaped dough log seam-side down into the prepared pans.
Cover loosely with plastic wrap or a clean towel.
Step 7: Final Proof
Allow the loaves to proof until they rise close to the top of the pans.
This usually takes 2–4 hours depending on room temperature.
If your kitchen is cool, proofing may take longer.
The dough should look puffy and airy when ready.
Step 8: Bake
Preheat your oven to 375°F (190°C).
Bake the loaves for 30–35 minutes until golden brown.
The tops should be beautifully colored and the internal temperature should reach approximately 200°F (93°C).
If the tops brown too quickly, tent loosely with aluminum foil.
Step 9: Brush with Butter
Remove the loaves from the oven.
Immediately brush the tops with melted butter.
This keeps the crust soft and adds a beautiful shine.
Step 10: Cool Completely
Allow the bread to cool in the pans for about 10 minutes.
Transfer to a wire rack and cool completely before slicing.
Cutting while hot may compress the crumb and affect the texture.
Tips for Perfect Sourdough Sandwich Bread
Use an Active Starter
Your starter should be bubbly and doubled in size before using it.
An inactive starter can lead to dense bread.
Don’t Rush Fermentation
Sourdough depends on time rather than commercial yeast.
Allow the dough to ferment properly for the best flavor and texture.
Measure Accurately
Using a kitchen scale ensures consistent results.
Bread baking is much more reliable when ingredients are weighed.
Keep the Dough Warm
Sourdough ferments best around 75–80°F (24–27°C).
A warm environment helps encourage strong fermentation.
Storage Instructions
Store the bread in an airtight container or bread bag at room temperature for up to 4 days.
For longer storage, slice and freeze the bread.
Simply toast frozen slices directly from the freezer whenever needed.
Serving Suggestions
This sourdough sandwich bread is incredibly versatile.
Enjoy it with:
- Butter and jam
- Peanut butter
- Avocado toast
- Grilled cheese sandwiches
- French toast
- Breakfast sandwiches
- Turkey and cheese sandwiches
- Homemade garlic bread
Frequently Asked Questions
Can I Use All-Purpose Flour?
Yes, but bread flour produces a softer texture and better rise.
Can I Refrigerate the Dough Overnight?
Absolutely.
After shaping the loaves, refrigerate overnight and bake the next day for enhanced flavor.
Why Is My Bread Dense?
Common reasons include an inactive starter, under-proofing, or insufficient kneading.
Can I Make One Loaf Instead of Two?
Yes.
Simply divide the recipe ingredients by half.
Final Thoughts
This soft and fluffy sourdough sandwich bread combines everything people love about homemade bread. It has the rich flavor of traditional sourdough while maintaining the tender texture needed for sandwiches and toast. Once you bake your first loaf, you’ll understand why so many home bakers make this recipe part of their weekly routine.
Fresh from the oven, brushed with butter, and sliced thick for breakfast or lunch, this sourdough sandwich bread is a simple pleasure that never gets old. With its golden crust, cloud-like crumb, and incredible flavor, it’s a recipe you’ll return to again and again.
